In a previous post I discussed the complicated process of configuring S3 to use Letsencrypt to obtain a TLS certificate. That post served as a reference for me to re-implement Letsencrypt every 90 days. Since then, my 90-day Letsencrypt certificate expired, and I was at a loss for how to re-instate it. Using my own post as a reference didn’t help me with the arcane letsencrypt errors I was encountering.
It was a pain in the ass trying to remember how to configure and use a combination of letsencrypt, awscli, virtual machines to run them in (letsencrypt has since implemented a docker option for running on OSX), et cetera, et cetera. I was hoping to get all of this done during a brief lull in my workday. Nope.jpg I’m chalking my experience up to the non-standard use case of using letsencrypt to generate a TLS certificate for a site hosted on S3. Perhaps in the future there will be native support for S3/Cloudfront sites in letsencrypt, but it’s not there yet.
Amazon, thankfully, saved the day. Apparently rolled out in January of 2016, Amazon offers Amazon Certificate Manager. Total. Win. Amazon Certificate Manager allows users of Elastic Load Balancing and Cloudfront to generate TLS certificates automatically, all through the AWS console.
Oh, and they’re Free.
OH, and they’re automatically renewed.
I was overjoyed to discover this. Getting a certificate set up via Amazon Certificate Manager was simple:
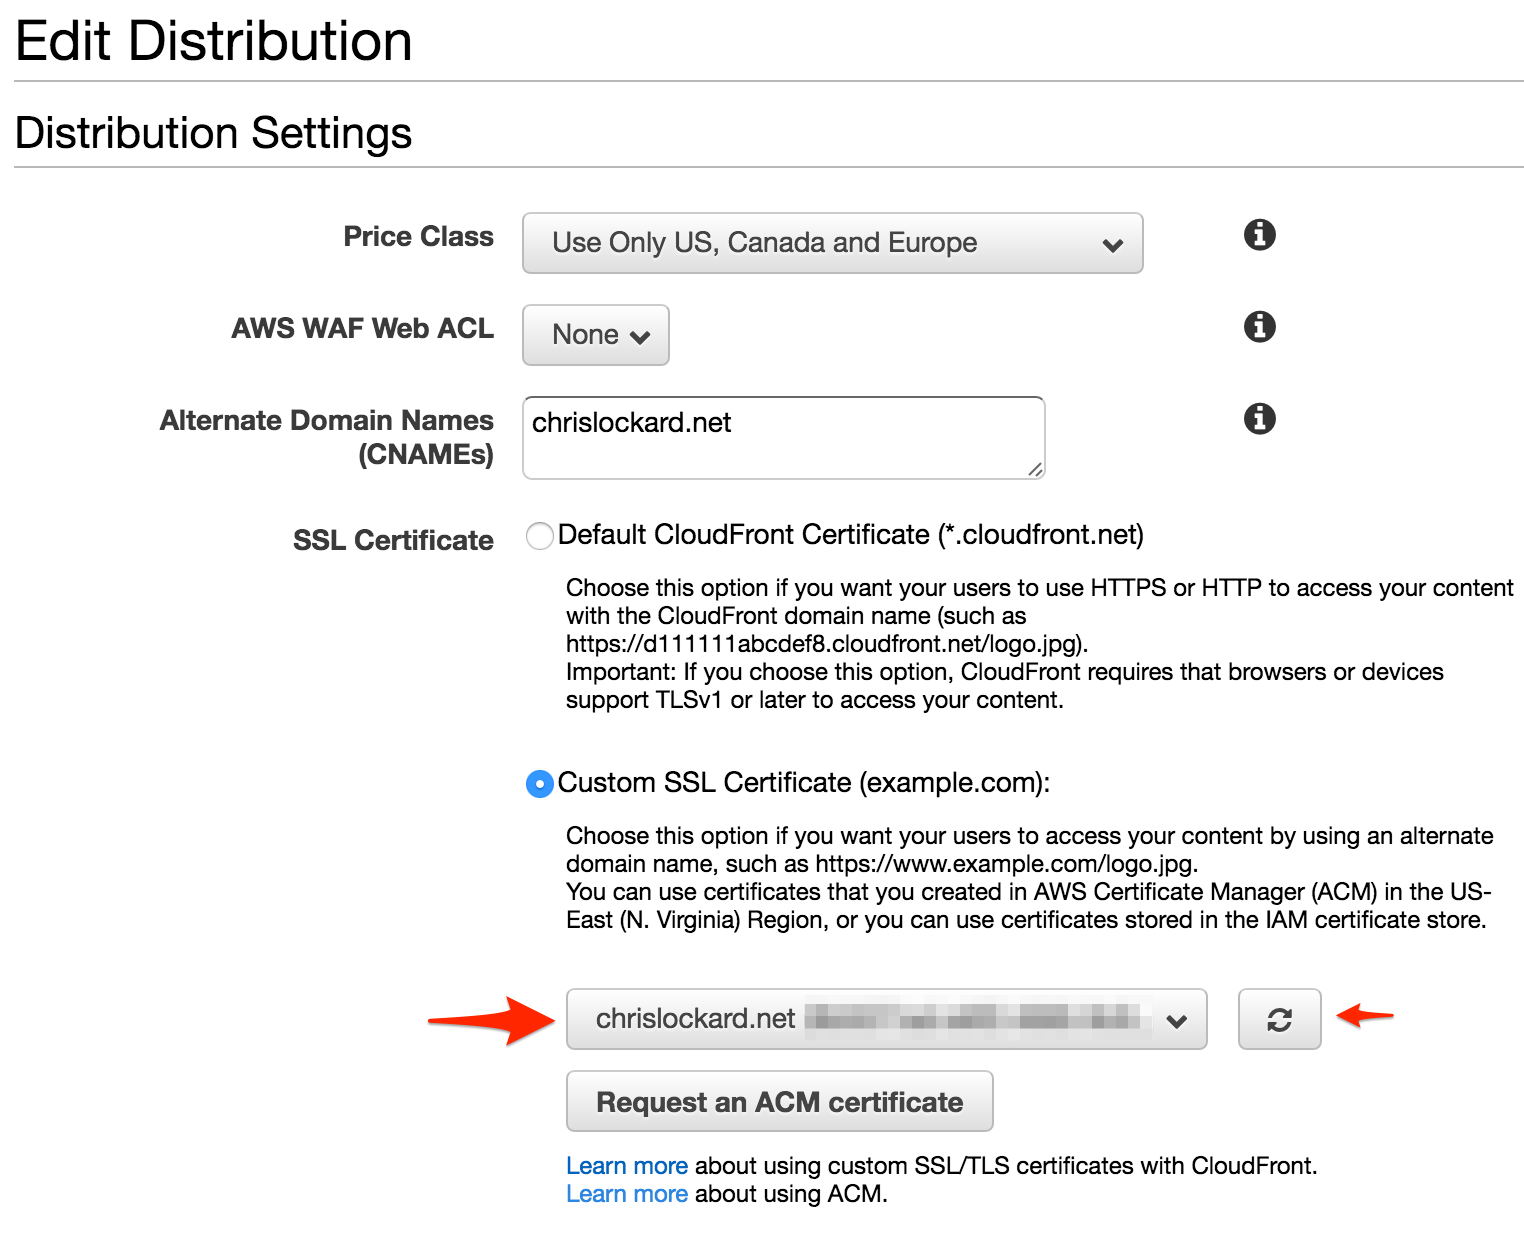
First, I edited my Cloudfront distribution settings:
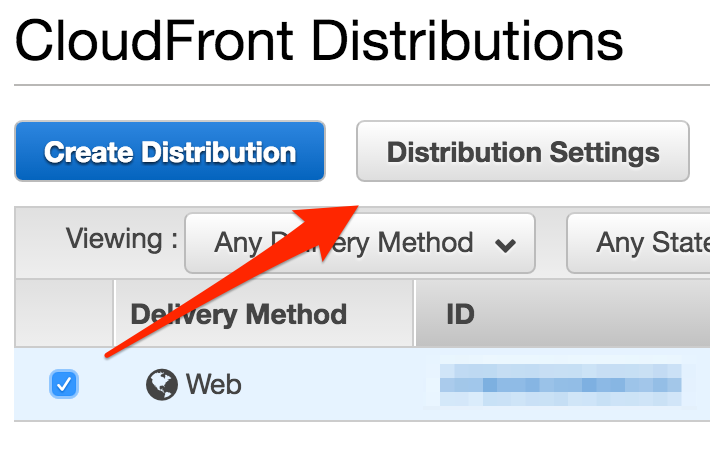
Cloudfront Distribution Settings
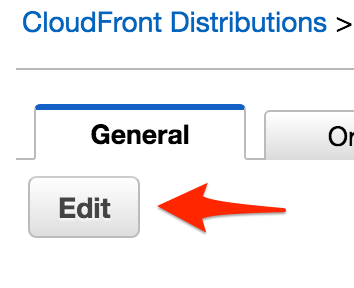
Edit Cloudfront Distribution Settings
Then, I started the “Request ACM Certificate” process.
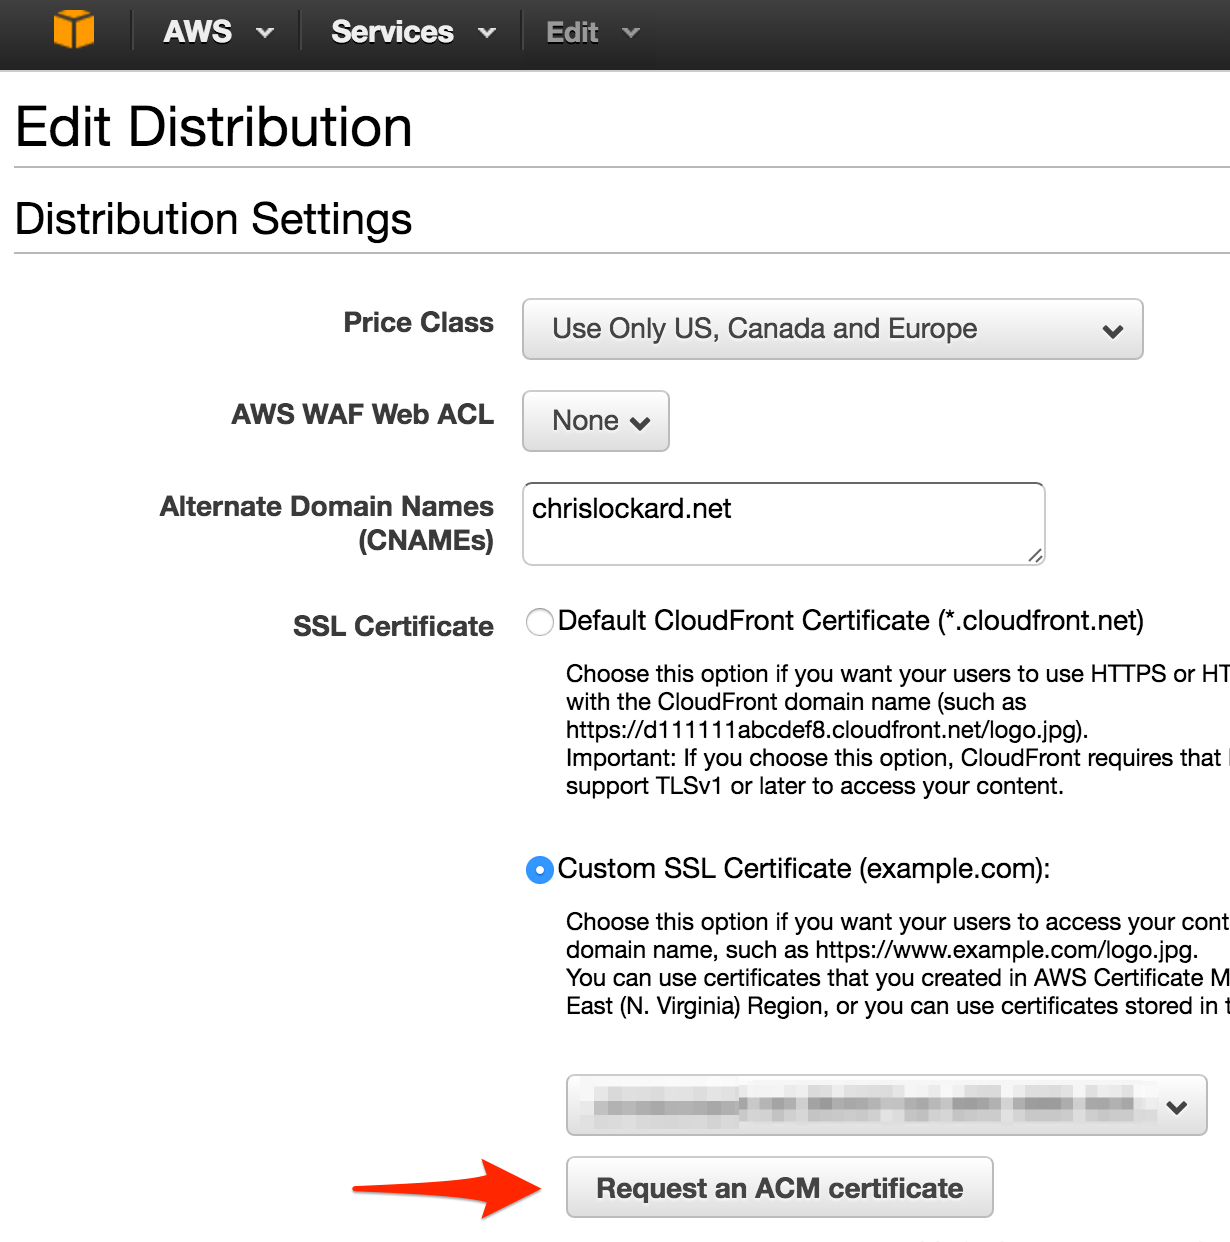
Request ACM Certificate
The request process was also easy, I specified the domain name I wanted to add to my certificate and continued the process.
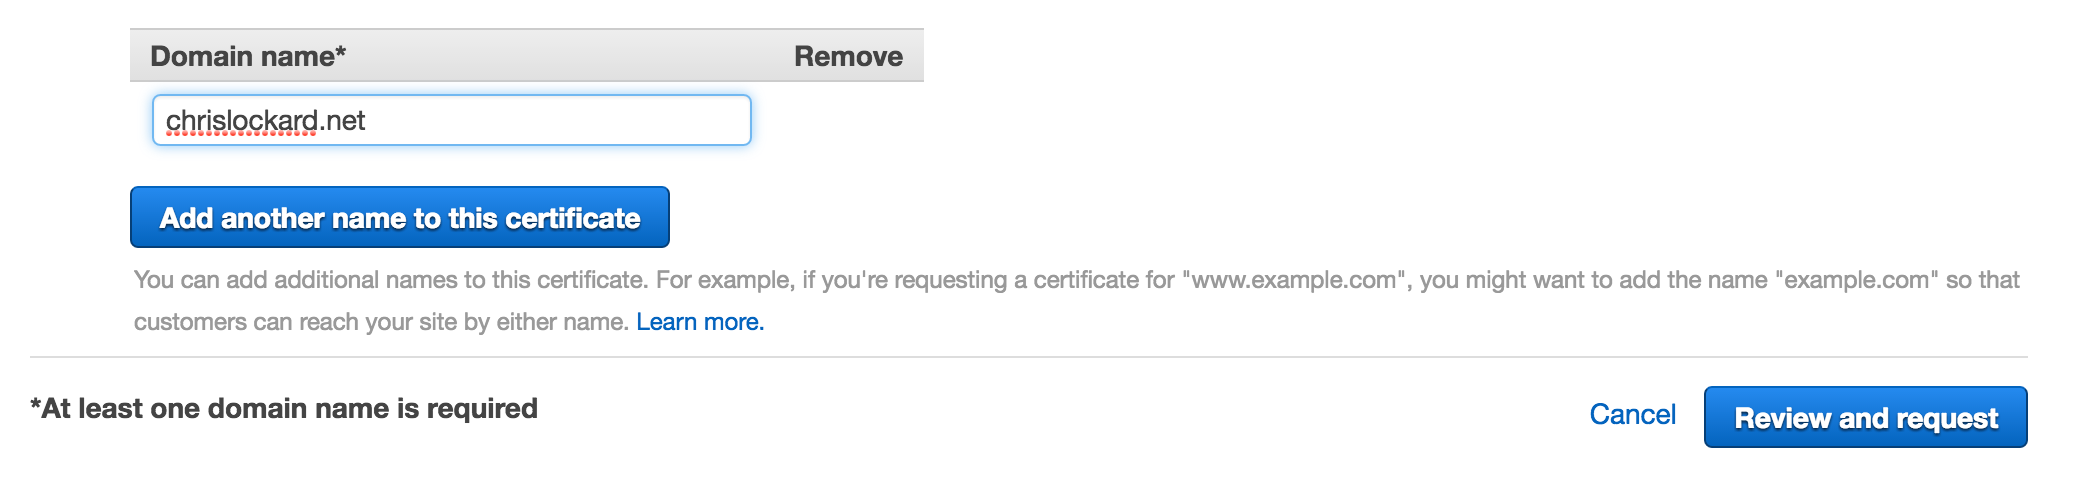
Request ACM Certificate
I ran into the only snare in the whole process at this step - domain verification. Amazon will send a confirmation e-mail to the following list of pre-defined email aliases:
administrator@your_domain
hostmaster@your_domain
postmaster@your_domain
webmaster@your_domain
admin@your_domain
This was a problem for me because I don’t host e-mail at this domain. Fortunately, ACM will also send a confirmation e-mail to the WHOIS contact for your_domain.
If you use WhoisGuard or a similar service, you can temporarily disable this during the certificate registration process so your WHOIS contact e-mail will be available to Amazon
Immediately after requesting the certificate, I received an e-mail, clicked on the embedded link, and my certificate was available in my Cloudfront settings.
Select ACM Certificate in CloudFront settings
I had to hit “refresh” once on the Edit Distribution screen and my certificate showed up. After selecting it and saving my changes, my CloudFront distribution encrypted TLS connections using my new cert!
Oh, did I mention it automatically renews itself? AWSome!